In CUNYfirst, Student Groups are used to “tag” students into different categories. We can report off these groups to determine what students are associated with those categories.
Student groups need to be maintained (inactivated or removed, if appropriate). Follow the steps below to add, inactivate, or delete a student group on a student’s record in batch.
Instructions
To view a student’s unofficial transcript, follow the steps below.
- Log into CUNYfirst.
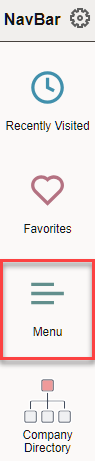
- Click on the compass icon on the top right hand corner of the screen to open the NavBar.

- Click on Menu.
- Follow the navigation below to get to your Advisor Center.
Campus Solutions > Records and Enrollment > Career and Program Information > Process Student Groups
- Click the Add a New Value tab to create a new Run Control ID if this is your first time running this process. If you have previously run this, Find an Existing value tab to search for an existing Run Control ID).

- If adding a new Run Control ID, we recommend using a generic name (e.g., BATCH_STUDENTGRP).
- Click the Add/Search button to proceed.
Population Selection

- On the next screen, check the Population Select checkbox. Then, select External File from the selection tool drop down menu.
- Click the Upload File button.
- Click the Browse button and select the desired file. The file selected should only have a column for EMPL IDs. This should be a .CSV or .TXT file.
- You may click on the Preview Selection Results link to ensure that your file is loaded correctly.
- Click the Upload button.
- For the File Mapping field, select EMPLID.
Student Group Data

- Enter the following values:
- Academic Institution: BKL01
- Student Group: Enter your student group or search for it using the magnifying glass
- Effective Date: The Effective Date will automatically update to today’s date. You may leave as is or change to a date more appropriate (e.g., first date of the term).
- Effective Status: You may run this process to activate or inactivate student groups.
- Active: If you are adding it to your population for the first time, choose the Active option.
- Inactive: Choose this option to indicate the last date that this group should be used. You can run this process twice to set up the Active and Inactive dates for your population.
- Comment: Enter any comments, as needed. Comments are internal and will not be displayed anywhere other than this screen.
Save
After you have completed the above, click on the Save button. This will ensure that your Run Control ID will be accessible the next time you run this process.
Running the Process
- Click on Run button on the top right.

- In the pop-up window (Process Scheduler Request), do not change any values. Click OK.

- Click the Process Monitor link.
- Use the Refresh button to update the data until the Run Status is “Success” and the Distribution Status is “Posted.”

Validating Results
Follow the instructions on the How to: Maintain Student Groups (Manual) page to spot check and double check that your students were assigned the student groups correctly.