The Scheduling Poll tool available in Outlook helps minimize the back-and-forth emails typically involved when scheduling a meeting by letting you send a poll of proposed meeting times to attendees (both inside and outside of CUNY), so they can vote on which times work best for them. It’s very similar to third-party tools like Doodle, with the added benefit of integration with your Microsoft 365 email and calendar.
Scheduling Poll gives you an organizer dashboard to track responses and can automatically schedule meetings once everyone agrees. Learn more.
Watch a video guide:
Instructions
Outlook on the Web
You can access Scheduling Poll via Mail or Calendar.
1. Start a new email or reply to an existing one. Add required attendees to the To field and optional attendees to the Cc field. Then, click Scheduling Poll in the Message tab.

2. Create a new meeting event or select an existing event to edit it. List required attendees in the Invite attendees field and click the optional button to add optional attendees. Select Scheduling poll in the Event tab.

1. Start a new email or reply to an existing one. Add required attendees to the To field and optional attendees to the Cc field. Then, click Scheduling Poll in the Message tab.
2. Create a new meeting event or select an existing event to edit it. List required attendees in the Invite attendees field and click the optional button to add optional attendees. Select Scheduling poll in the Event tab.
Outlook on Windows
Also see: Create a Scheduling Poll in Outlook for Windows
You can access Scheduling Polls from Mail in two ways:
1. Select Reply with Scheduling Poll on the Home tab when an email is open in the reading pane.

2. Launch the compose pane by either creating a new message or hitting reply/forward for an existing message. List required recipients in the To field and optional recipients in the Cc field. Then, on the Message tab, select New Scheduling Poll.

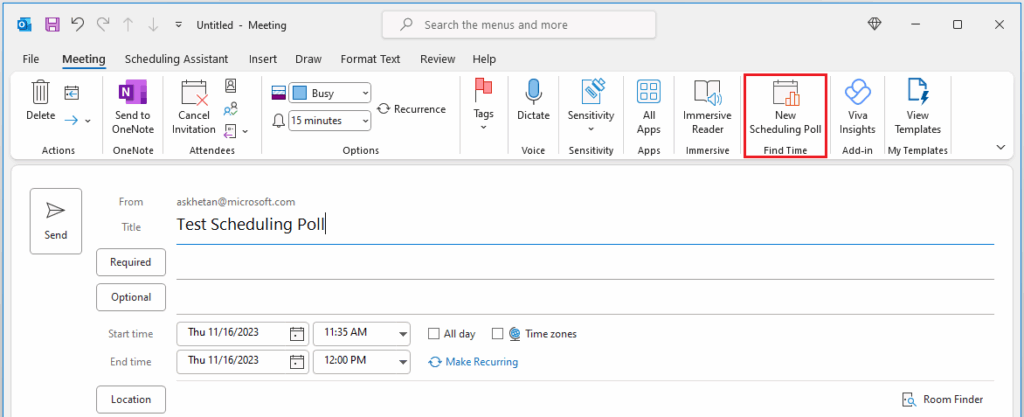
You can access Scheduling Polls from Calendar by either launching the compose form to create a new meeting event or opening an existing event in the edit form. List required attendees in the Required field and optional attendees in the Optional field. Select New Scheduling Poll under the Meeting tab.
You can access Scheduling Polls from Mail in two ways:
1. Select Reply with Scheduling Poll on the Home tab when an email is open in the reading pane.
2. Launch the compose pane by either creating a new message or hitting reply/forward for an existing message. List required recipients in the To field and optional recipients in the Cc field. Then, on the Message tab, select New Scheduling Poll.
You can access Scheduling Polls from Calendar by either launching the compose form to create a new meeting event or opening an existing event in the edit form. List required attendees in the Required field and optional attendees in the Optional field. Select New Scheduling Poll under the Meeting tab.
Outlook on Mac
You can access Scheduling Poll via Mail
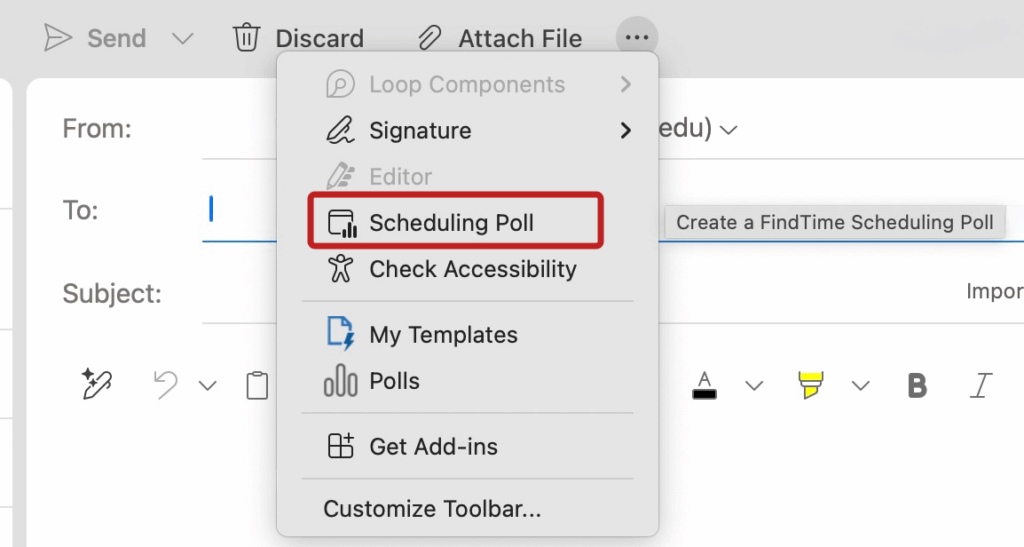
1. Create a new email or select an email to reply to. List required attendees for the meeting in the To field and optional attendees in the Cc field.
2. Select the more option ellipses (…) button then select Scheduling Poll from the compose toolbar.

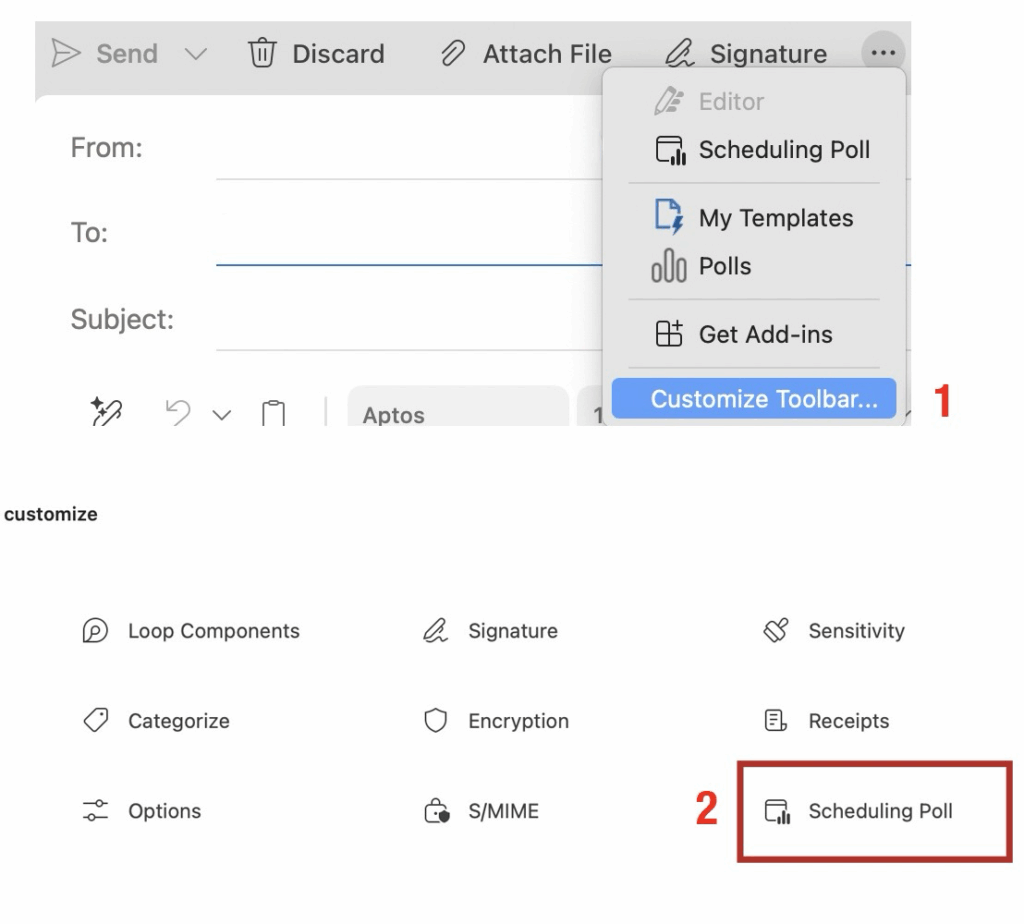
Note: If you don’t see the the Schedule Poll option, you will need add it manually by customizing the toolbar when you’re composing a new email message. First select Customize Toolbar then drag-and-drop the Schedule Poll option to your navigation bar.
1. Create a new email or select an email to reply to. List required attendees for the meeting in the To field and optional attendees in the Cc field.
2. Select the more option ellipses (…) button then select Scheduling Poll from the compose toolbar.
Note: If you don’t see the the Schedule Poll option, you will need add it manually by customizing the toolbar when you’re composing a new email message. First select Customize Toolbar then drag-and-drop the Schedule Poll option to your navigation bar.